Showing posts with label home diy. Show all posts

Tuesday, April 8, 2014

Buy or DIY: An Update

A few weeks ago, I was asked about my kitchen cabinet DIY mentioned here,and I thought it was about time to provide an update for everyone on how they are holding up!  

Remember when we painted our kitchen cabinet using Rustoleum's Cabinet Transformations Kit that we bought for an absolute steal?  Well almost two years later, they still look like new!  Now granted, we don't have any kids to bang on them with pots and pans or pets that might scratch them up, but we haven't been tiptoeing around them constantly worrying about messing them up either.  On the contrary, we have added a backsplash and replaced the microwave since they were painted and they are no worse for the wear.  


If you have ever considered painting your own cabinets, here are a few tricks that have kept these babies in mint condition:
  • We put in the time at the beginning, knowing that it would save us in the long run.  Completing the project took us a lot of dedicated time and we followed the directions to the letter.  We agree with the instruction manual that ideally one person should complete a whole step to avoid variations in color, pattern, or style.  While this doesn't save you any time, this painstaking process now seems worth it ten times over because we have a professional, uniform look that makes us want to keep them in tip-top shape.  They don't feel DIYed.
  • I wipe the cabinets down with a wet rag when needed and a little organic multi-surface spray if they're really dirty.  I don't use anything that could damage or break-down the polyurethane or alter the color of the paint.
  • I use a wood finish stain marker to touch up any nicks or imperfections that might come up.  It doesn't happen often but if I'm clumsy with a fork or saucepan, the marker takes care of the damage.
  • The clear, plastic rubber bumpers that we put in the corners of the doors and drawers seem to be preventing most dings.  {If you're lucky enough to have slow close cabinets then you could skip this step of course}
  • If you do notice a larger imperfection that a stain marker might not take care of, think hard about how you plan to fix it.  Once something is polyurethaned it's pretty hard to make touch ups that aren't noticeable.  
Has anyone else used the kit?  Any tips you've learned to keep your cabinets look new? We are so happy that we chose to give it a shot because we still love the results two years later!

Tuesday, March 11, 2014

Foyer Update

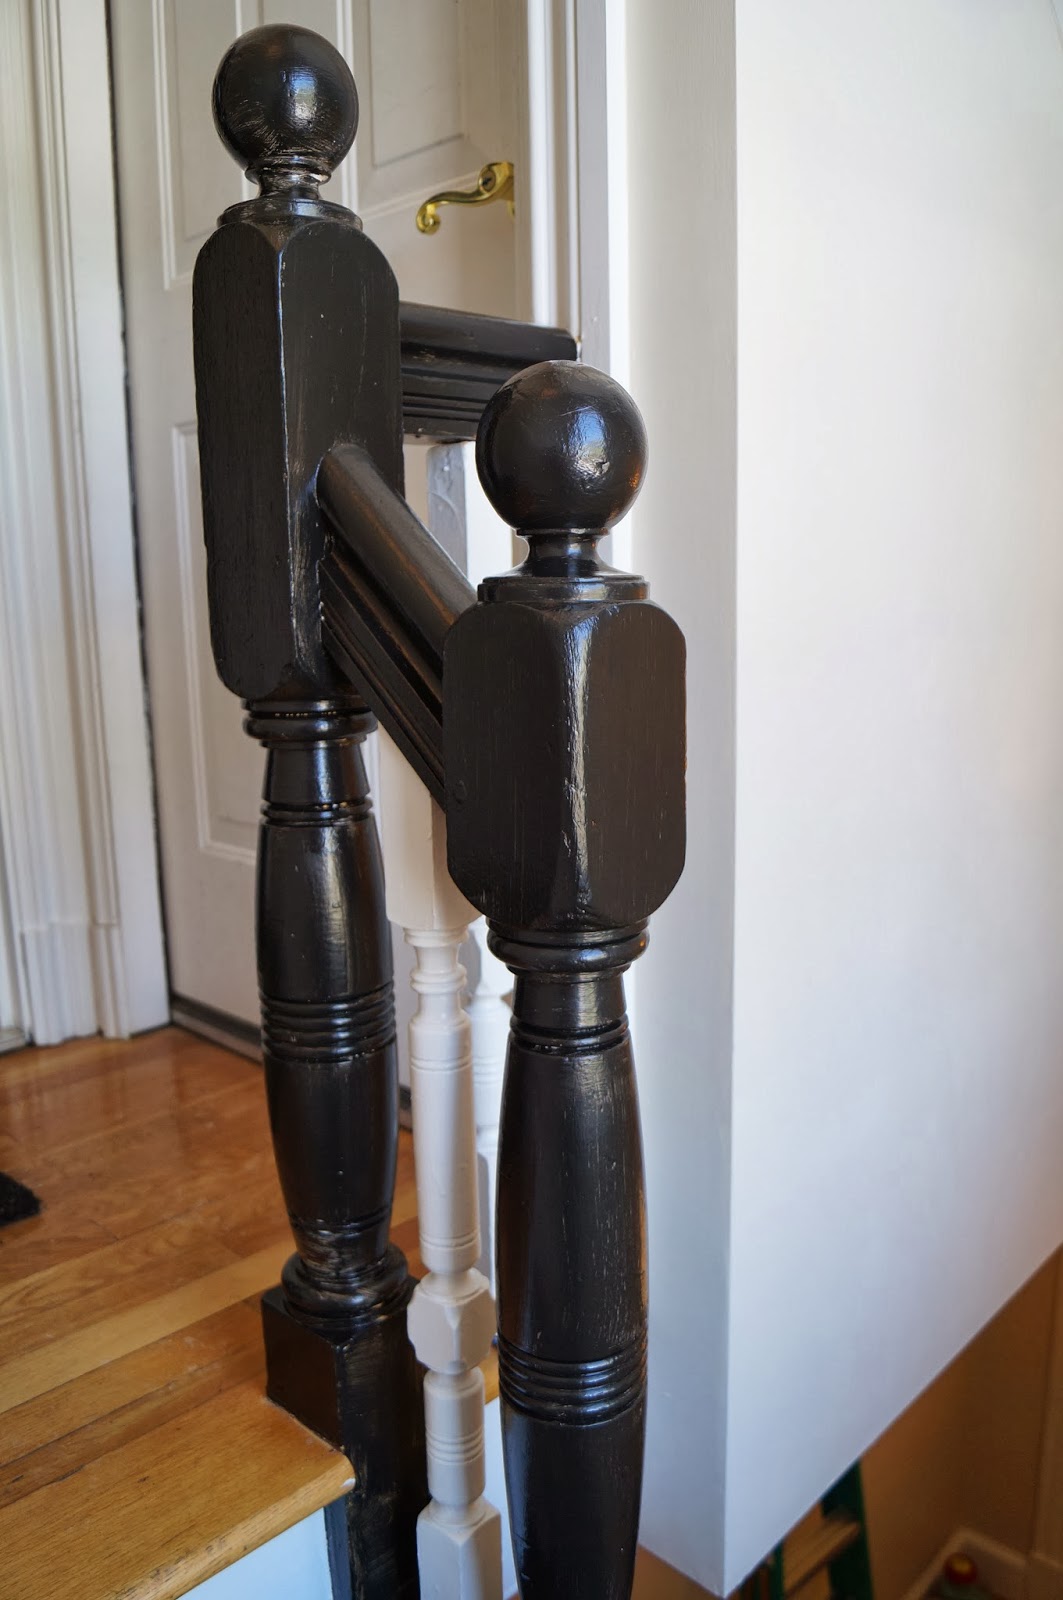
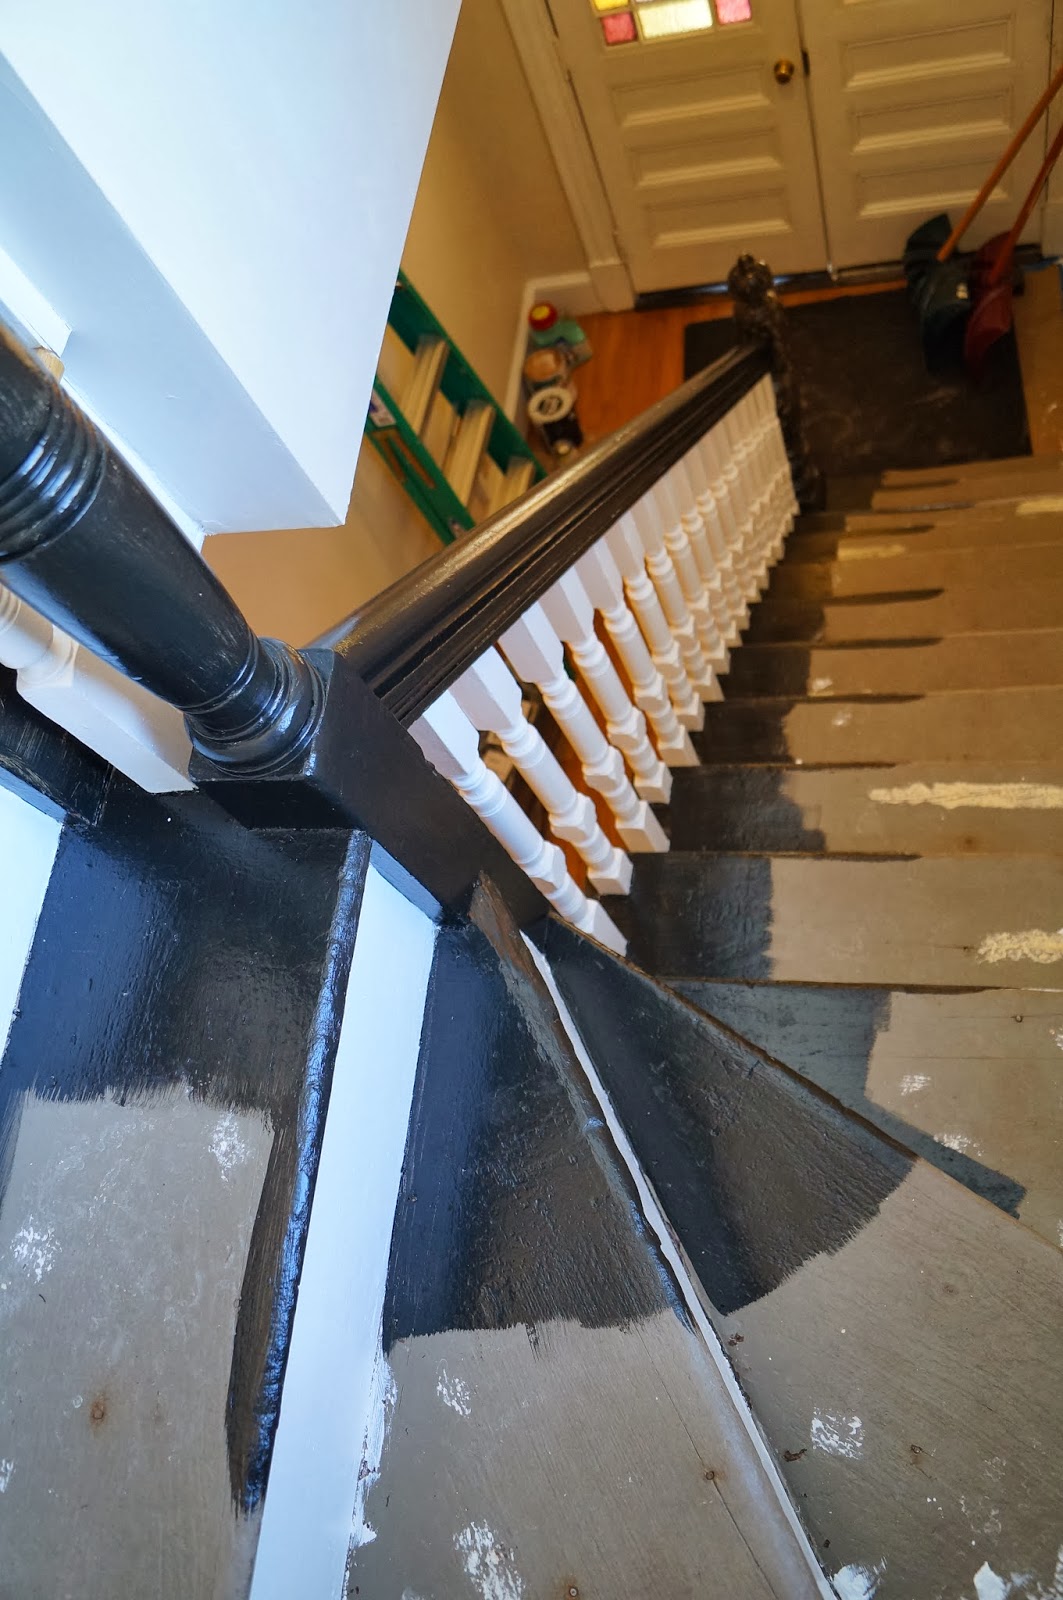
Our foyer transformation is in its final stages, so I thought I'd share an update before the big reveal.  It has taken a bit longer than expected because painting stairs and spokes is crazy tedious, but it's all worth it.  So when I left you last, I showed you some before photos and our inspiration photo.  Here are some photos of the project in progress.


So what went into this transformation?

As you can see, I used a TON of spackle and wood filler to repair these stairs.  Call us naive, but we weren't expecting them to be in as bad shape as they were.  That's what you get for living in a one hundred year old building I guess.  I used wood filler in areas that actually needed to maintain structural integrity (ie. some of the steps themselves were split a bit) and the spackle was for the aesthetic issues only (ie. where some of the risers had been kicked repeatedly over the years).


Also there was plenty of caulking to fill cracks and spaces that we didn't quite notice until the paint went up.  It's amazing what a big difference a little caulk can make.


As you can see, we go gloveless and tool-less when it comes to caulking and it seems to work well for us every time. 

After the caulking, it took several coats of primer and white paint, but it finally started slightly resembling what we wanted it to look like.   And once the black paint went on, the look really started coming together.


I know it doesn't look like much now, but it's a huge improvement from where we started.  And now you've been let in on the little secret that we didn't paint the whole stair black, just the visible portions.  I'm not about wasting paint on something that will never be seen.  Next up, a carpet laying tutorial and the big reveal!

Wednesday, January 15, 2014

Home Tour: Our Foyer

It's a new year and about darn time for a home update!  We have been pretty happy with how things look inside of our unit (I really owe you some current pictures of the living spaces), but our shared common area in the building was looking really shabby.  We have a small "home owner's association" of sorts composed of the five residents of our building. We all agreed that it was time for a little sprucing.


Please excuse the extreme yellowness.  Between the cream walls, yellow trim, and beige carpet, it's really a very yellow space.  Our plans are to paint the trim a crisp white, tear up the carpet, and give the staircase a painted makeover with black and white.  Here's one of our inspiration pictures.


{via}
Ahh much less yellow.  We will also be giving the walls a fresh coat of paint in a pretty neutral that my neighbor and I chose.  It's called Sail Cloth by Benjamin Moore. 


Oh and we have big plans for this dirty, worn carpet.  It's sort of a runner alternative that we're all really excited about.

This weekend, we put the first coat on the walls, but there is a lot left to do.  I will let you know when the project is complete with plenty of lovely after pictures and hopefully a tutorial.  Off to paint some more!


Thursday, September 5, 2013

A Low Maintenance Gallery Wall

    Gallery walls continue to be huge all over home decorating websites, blogs, and Pinterest, so I wanted to show you ours because it's a little different from anything I've seen anywhere else.  It all started with the problem of where this wall is located in our home.  You see, the most conducive wall to a large photo display is in our dining room area.  The problem is that this wall is on the same wall as the door to our condo.  Every time the door shut, the picture frames would shift.  By the end of the day, the frames were all tilted in different directions and looked like a hot mess.  I do not have the patience or the time to shift frames back to level every single day.  So I looked into alternatives and found a solution!

red envelope

    These frame sets made by Red Envelope hang on a rod, so they sit just off the wall.  Now when we shut our front door it doesn't destroy our arrangement!  

    The left side is all Boston themed.  It includes a map, a shot of the Charlestown Bridge taken by our wedding videographer, two pictures of the Zakim Bridge, some random Instagram photos, some homemade art, and a "Home Sweet Home" print.

    The right side is devoted to places that we have traveled.  It includes shots of Chicago, Brooklyn, St Lucia, Martha's Vineyard, St Louis, and an "Eat Well, Travel Often" print.

    We love how this looks, but I am a little disappointed in the quality of the frames themselves.  I hoped that this gallery wall would be a place where we could switch out photos and update things over time, but the frames are a little too flimsy for that.  I highly recommend these frames for an easy gallery wall that does all the work for you--no laying out frames for days trying to find the perfect configuration, no cutting out traced paper to try the configuration out on the wall, no putting 50 tiny holes in your wall.  It's a lazy version of a gallery wall, but we love it.  

Wednesday, July 10, 2013

The day everything broke

    Alternate title: the day I wished I had a landlord.  Alternate alternate title: sometimes being an adult is expensive.

    Kevin and I have owned our place for just over a year, and it's gone pretty smoothly.  I love DIY projects and I'm lucky to have such a handy husband.  So far the only thing we had to call a professional for was a broken garbage disposal that we weren't 100% sure needed to be replaced (turns out that thing was most definitely dead--and smelled like death too!).

    Other fixes were totally doable: painting, refinishing our cabinets, in-wall speaker system, etc.  We were DIY warriors....until the day that everything broke.  Nothing will knock you off of your DIY high horse like a broken air conditioner in the summer heat.  Not only is it something that the average person just isn't familiar with, but your motivation to take on a DIY project substantially decreases as the temperature in your house increases (this is a scientific fact I'm sure).  Now, it should be said that rarely do appliances just up and die with no warning.  The fridge had been making sounds for a month that we ignored.  The microwave had issues from the beginning.  But the AC unit broke without giving us any sign..on one of the hottest days of the year.  And on this very same day, the fridge finally decided it stop keeping our food cold for good and the microwave wouldn't open.

{Yikes!}

    The moment I saw that thermostat reading, I immediately wished that we had a landlord I could call up to fix it for us.  Luckily, the heating and cooling company that we found said they'd be here in 90 minutes.  Unluckily, being homeowners meant that we'd be paying some unknown amount of money in just a matter of hours.  There's nothing scarier than inviting some repairman into your house when you have no idea what could possibly be wrong.  They could tell you anything.  I hate being so vulnerable, but I was freaking hot!  Who knows how much I would have forked over just to be comfortable again.

    After a little searching on Yelp, we chose an appliance repairman to take a look at the fridge.  The next day the fridge repairman came (I was happy I wasn't asking him to work in an 83 degree environment thanks to the previous day's fix).  

{Grr. Broken appliance #2}

    Even though it was only the fridge portion that wasn't staying cold, the broken part was actually in the freezer so I had to move everything into a cooler with ice.  Twenty four hours (and more money) later that was fixed up too.  Lesson learned: when your refrigerator starts to make weird noises, don't look at your spouse and say "what's that?" like we did.  Call someone to help before you start having to toss food that's starting to spoil.  A repairman isn't cheap but neither is replacing a whole fridge worth of groceries!

    It was sad that by the time we got around to the microwave a few days later (the only appliance that we actually had to fully replace) I wasn't even that excited about getting to pick out a new one.  I thought I'd be ecstatic to be appliance shopping.  Instead I let Kevin find a good deal and that was that.  The install didn't go as smoothly as he planned but after a couple of day's work, it was up and running.  I realize that by showing you the picture below I'm totally spoiling another project that we finished but hadn't yet shared the details on.  Yes, that backsplash is a DIY project that we took on a little while ago.  Tutorial to come soon I promise.


{Pardon the mess. This was after Kevin installed the new microwave but before cleanup!}

    I love being a homeowner but some things just don't go as planned (like when your AC, fridge, and microwave die all on the same day).  But it's worth it!  Sorry for this bummer of a post but I'm just keeping it real today.  Sometimes being an adult is expensive.
    

Friday, June 21, 2013

Master Bedroom Reveal

   As promised, today I'm sharing our "finished" master bedroom.  Several of the DIY projects have already been featured here and here.  The curtains and curtain rods are also DIY and I plan on sharing details on those as soon as I finish them.  At this rate, it could be awhile.  I think I've been "working on the curtains" for over a year.   


     I truly don't think a room is ever done, so as I tweak I'll be sure to update you on the progress.  Our style is mostly modern traditional but that's also constantly changing so who knows where we'll end up!  Happy Friday everyone!

Source List
Wall frames: Crate and Barrel, Nightstand: Ikea (with DIY trim, paint, stain, and pulls as described here), Lamps: Bed, Bath, and Beyond, Headboard: DIY, Mirror: West Elm, Pillow: Target, Duvet Cover: West Elm, Turtle Jewelry Holder: West Elm, Frame: Target, Curtains: DIY, Curtain Rod: DIY, Armchair: Bob's Discount Furniture, Throw blanket: West Elm, Side Table: Danbury Mint, Dresser: Ikea, Vase: Target, Rug: Surya via One King's Lane

Thursday, June 20, 2013

DIY Nailhead Headboard

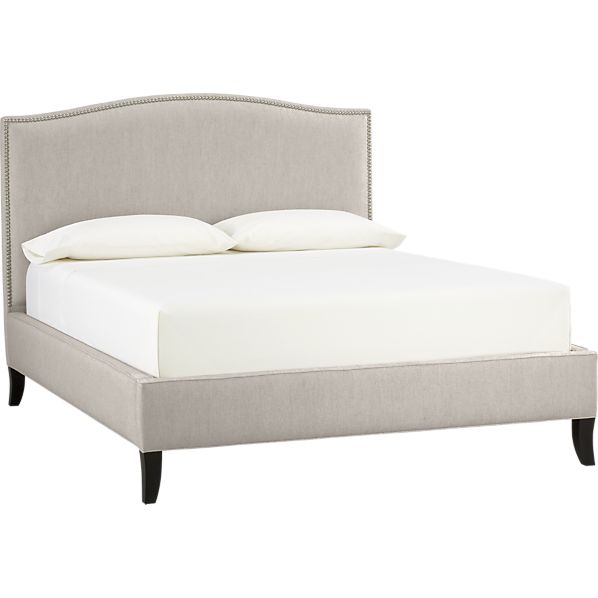
    So when I last left you with our bed situation, we had just purchased a California King.  Once our new giant bed was in place, all that was missing was a nice large headboard to make the set-up feel complete.  We knew that we wanted to build our own, both to save money and create more of a custom look.  Some of my inspiration?

 {source}
 ColetteBedQueenNatrlF10
 {source}

    Having never taken on this project before, I hunted for the perfect tutorial.  We used this tutorial from J and J Home for the look of the headboard and turned to my faves John and Sherry of YHL for the construction details.  The whole project took only a couple of hours and cost about $60.  

    As I mentioned yesterday,  I don't have any real construction pictures because this project was completed before I started blogging.  But trust me when I say that both tutorials above are more than enough to get you through this project if you want to do it on your own.  

{Getting the nailhead trim straight is a tedious process.  I definitely recommend two people.  One to nail in and the other to direct.}


{But from further away, it's harder to tell if there are any imperfections}


{This picture shows that we mounted the headboard to the wall rather than building legs for it.  See how its sort of "floating"?}

     Tomorrow I will be sharing pictures of the master as it looks today.  I can't say it's done because is decorating ever really done?  Some of the accessorizing could use some tweaking, but it will give you an idea of where we are in the process.  It's so different from where we started.  Below is the master bedroom photo from the listing of our condo.


Stay tuned!

Wednesday, June 19, 2013

Ikea Hack: Rast Dresser Turned Nightstand

    Here's a quickie before and after project for you.  As I mentioned last week, Our new bed was dwarfing our nightstands.  It was not only a decor nightmare but it was borderline dangerous considering that I nearly fell out of bed to turning off my alarm in the morning.  Sorry I don't have any pictures to demonstrate the hilarity of this, but I'm sure you can imagine a thoroughly embarrassing visual all on your own.  We needed nice large nightstands that came to about the height of the bed.  Enter: Ikea Hacking.


    If you don't know what that means, head over to www.ikeahackers.net and be sure to grab a snack first because you will be hooked!  People are so creative spicing up their bland Ikea purchases.

   Why did I say this was a quickie before and after? Don't be fooled because this did take us a solid chunk of time.  It's a quickie because I have practically zero pictures to show you.  This project (and the one I will share tomorrow) were done a few months back before I realized that I would eventually want to have some "during" pictures of the projects or thought anyone would be remotely interested in them.  But it'll all be okay because as promised, the master bedroom reveal is coming Friday and I will share plenty of details about how that came together!


    We used two main tutorials to complete this hack of the Rast Dresser from Ikea.  One is from Anna at Take the Side Street and the other is from The Charming Nest.

    The main difference between what we did and what the other tutorials showed is our hardware.  We chose to fill the holes that the original hardware left and purchase new pulls.  Right now we have an array of other fixture colors in our place (brass and silver), but I am trying to slowly change everything over to oil rubbed bronze.  These pulls were about $9 each in the bronze finish, but in nickel they were only $2 each.  It looks like I splurged but actually I spray painted the cheaper ones using Rustoleum Oil Rubbed Bronze and Clear Protective Coat.  So far they have held up really well which is great news for me and bad news for all of the knobs and hinges in the rest of the place.  Your brass days are numbered my friends!
 

Wednesday, June 5, 2013

Easy Free Art

    So last week I showed a sneak peek of an art project that I was working on.  See, months ago I thought that the wall in our master bathroom was looking a little bare.  So I found the perfect frame, had my husband hang it up, and then it sat there empty day after day after day.  Does anyone else do that?  Have every intention of finishing an easy project but then just let it sit around for ages?  Anyway, with my in-laws coming in for the weekend I finally felt enough motivation to just get it done.  I searched Pinterest for some free art ideas and came across this ombre paint chip art tutorial from The Lovely Cupboard.  I loved the mix of colors and the fact that I could easily pull it off in just one day (aka the morning that my company arrived).

    I promise to show a full picture of this bathroom soon so you can get a good idea of how this piece of art fits in as a whole.  Our textiles in there are all mint colored so I went with a blue/green theme with a touch of yellow.  

- First I went to the home improvement store and grabbed about 15 paint chips in varying shades--some deep some almost white.

 {Paint chips laid out to get an idea of how they worked together}

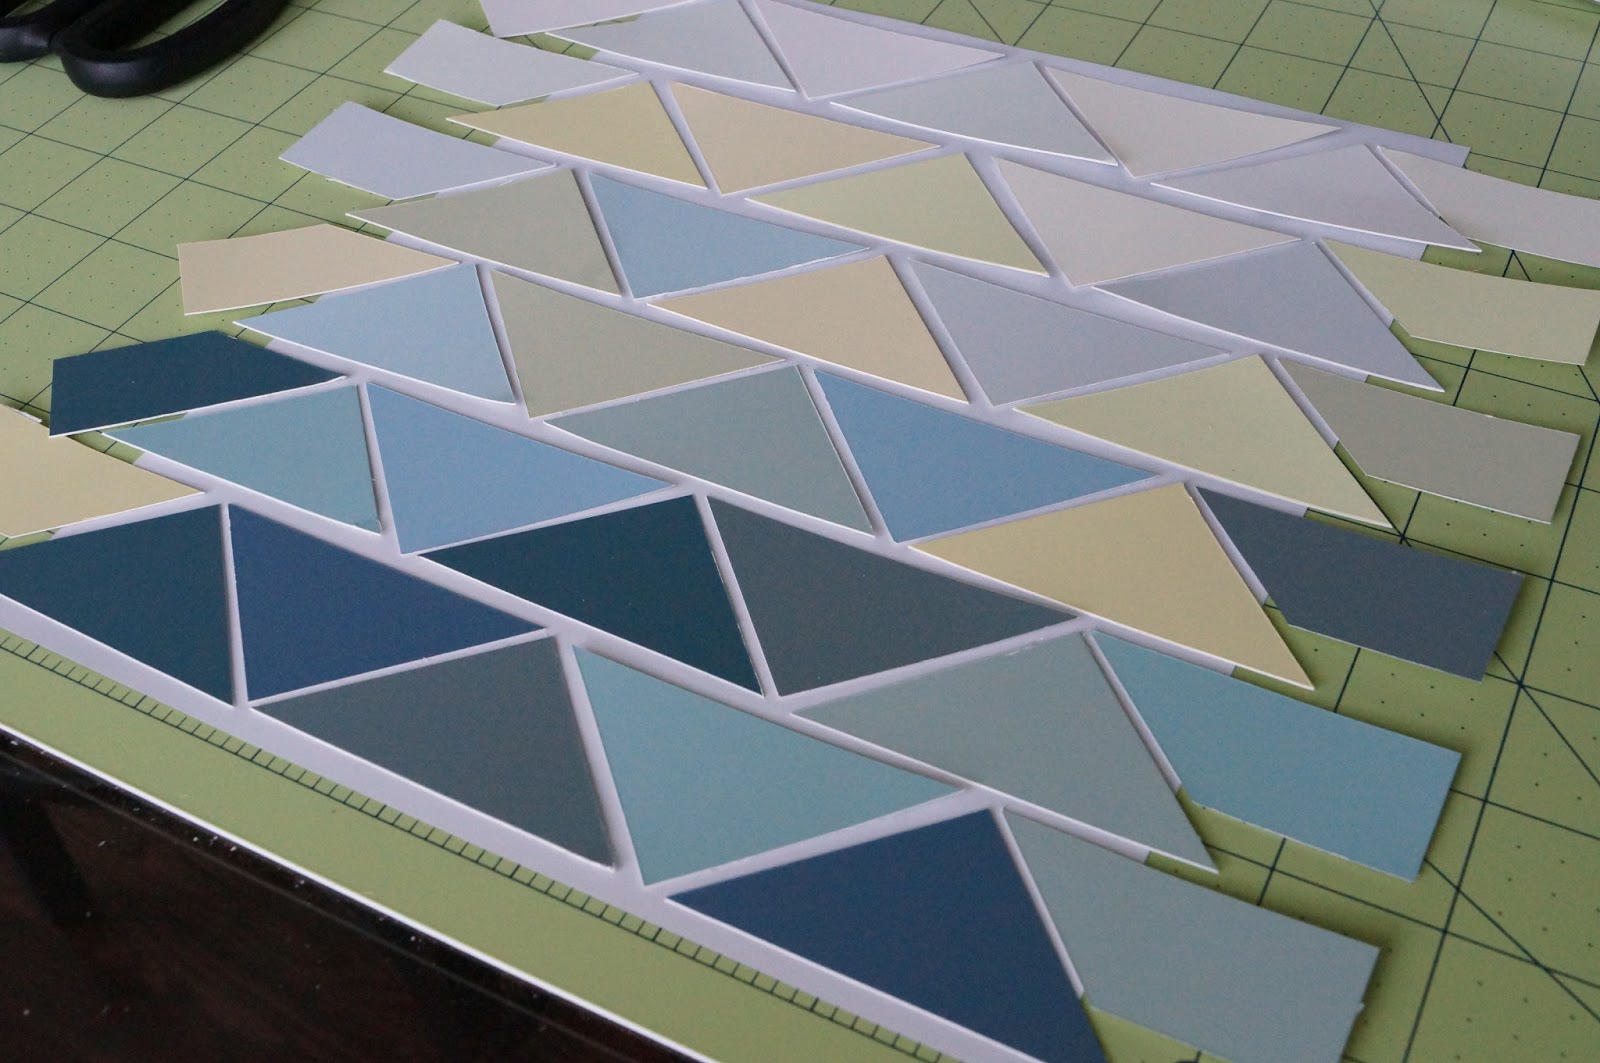
- Then I cut them into triangles using a blade and my handy dandy measure mat.

 {Paint chips all cut into triangles}

- I laid out the chips in the pattern that I liked and got ready to secured them down to a sheet of paper.  I literally just used the paper that came in the frame.  I highly recommend using a glue stick here but I couldn't find mine and was on a time crunch so I just used tape.

 {Pieces all secured down before I trimmed the sides}

- Then I just framed it up.  This project took about an hour.


    I love how it looks.  And I love that if I get sick of it down the road, I won't even feel bad switching it out because it was 100% free!

Linking up with:


DIY Show OffHouseofHepworths

Friday, May 17, 2013

Involved in a Cover Up

    Maybe I've been watching too much Scandal, but I couldn't help but get caught up in a cover-up operation myself.  Ok, so it was nothing crazy, but it was definitely time to address a huge eyesore in our condo that I had to see every time I walked into our master bedroom. 


    A huge breaker box was really not in the design, so we needed a plan to cover it up.  We may be a little behind the times, but we are still smitten with subway art here in this household.  Even though they were big back in 2011 and here we are two years later, I find that there is something so timeless about them, and I think that's really important when choosing art that you are going to see on a daily basis.  

    I searched Pinterest on a hunt for the best and simplest tutorial.  The one that suited our needs the best was found here by Lemonade Makin' Mama.  It basically involves building a wooden box and adhering a large blueprint style piece of paper to it.  We followed it almost to the letter, so I won't re-hash it here for you.  I do have a few notes and tips though: 

    First of all, Kevin is way better at formatting than I am.  I get really frustrated when I can't get something centered or words get cut off, so this job was relegated to him.  We chose some of our favorite neighborhoods or areas in Boston and a few different fonts and Kevin drafted this up in Word.  He fixed up the dimension settings before saving it as a PDF for submitting to Staples to print up for us.  

    I went along with the tutorial and used Elmer's Spray Adhesive to adhere the paper to the wood.  I'm glad that I did because I think Mod Podge would have caused a lot of unwanted rippling.  This step might be completely different should you choose to use a canvas as your base instead of building a wooden box.  In fact, that was my original plan.  I've seen some awesome tutorials for creating canvas style prints on Pinterest that would work equally as well I'm sure.  It just didn't work in our case because we needed a super custom size.

    Full disclosure, we didn't stay under $10 like the tutorial that we used.  Wood can be pricey!  But we did stay pretty close to the budget.  Also, I didn't have any Mod Podge of all things so I had to add that in as an expense.  It wasn't used in the tutorial that we followed, but I used the Matte Mod Podge to sort of seal my work afterwards.  It did cause some rippling which terrified me (starting over didn't sound like fun), but once the Mod Podge dried on the surface, I flipped the whole thing over to flatten out overnight and it worked like a charm!  Here it is before it was hung.


{A close-up of the distressing that I did.  I love that you can see the nailhead from the box construction through the paper.  That was a happy accident!}


    Kevin used some hooks above the breaker box to hang the wooden frame.  You can actually see them in the before pictures up top.  We needed to still be able to access the breaker box for obvious reasons so this hook system has offered easy access so far.


    Have you covered up an eyesore in your house recently?  
    Or better yet, did anyone watch the Scandal season finale last night?  I'm obsessed. 

    I will be linking this project to the following:


Follow my blog with Bloglovin

Wednesday, May 8, 2013

Pinterest Challenge

    I am beyond excited to that I have a project to share with you as part of the Spring Pinterest Challenge put on by Sherry from Young House Love, Katie from Bower Power, Emily from Sparkle Meets Pop, and Renee from Red Bird Blue.  The Pinterest Challenge is a one created by Katie Bower to get us to stop pinning and start doing...and then start pinning again.  Oh, the vicious cycle!


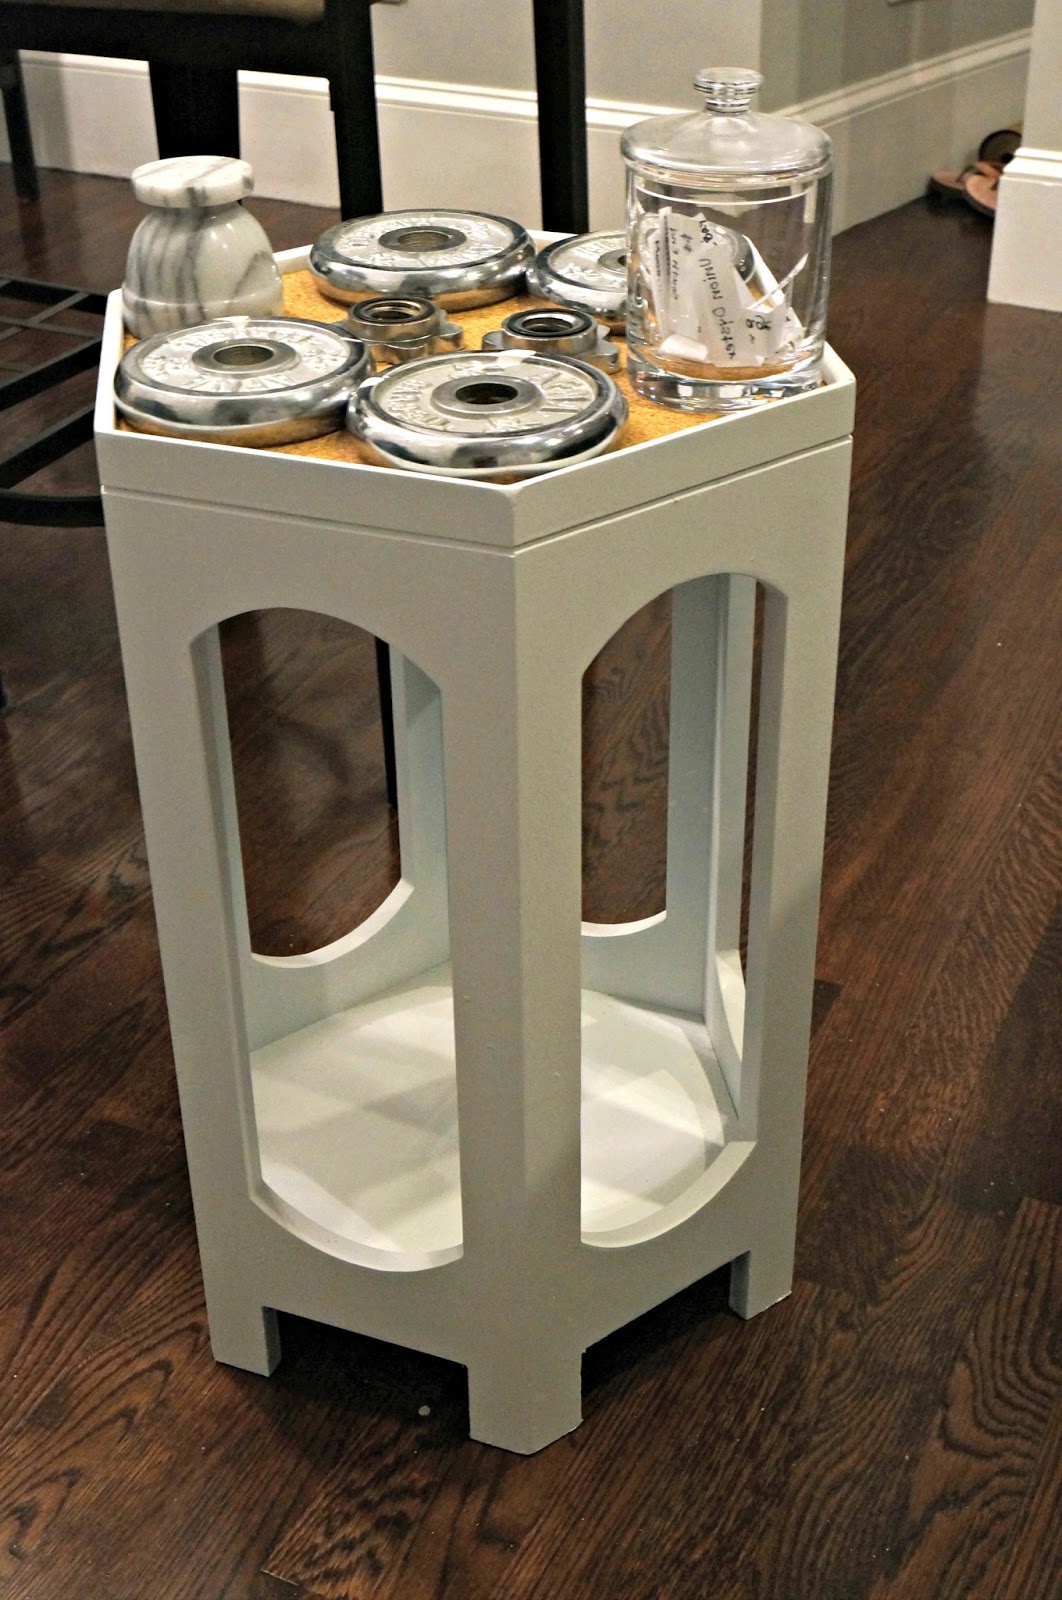
    This isn't the first time I've created something that I've been inspired by on Pinterest, but this is the first time that I have blogged about it, so pinch me because I'm really excited! The search for the perfect project was an easy one.  I had a side table sitting in our living room that I recently purchased from Home Goods (or "The Goods" as I lovingly call that heavenly place).  We needed one desperately, as we have no space for a coffee table and needed a place to put our drinks and snacks while watching our endless amounts of DVR.  The table met all the physical requirements that we needed, but unfortunately it was in a shade of blue that didn't really coordinate with anything else in the room.  I knew that I wanted to paint it, but I also knew that we needed something on top because we're not really the best about using coasters and I didn't want to paint the table only to mess up the finish with water marks.


    Enter my inspiration from Allison of Dream a Little Bigger.  She had a dinged up table that she loved but just needed a little fixing.  So she corked the top!


    I loved this solution for us.  It would prevent water marks and eliminate the need for coasters.  So I bought a roll of cork at Michael's and a $2 can of clearance spray paint at Joann's and got to work.  This wasn't my first spray paint project, but I definitely learned a couple of big lessons during this one:
1) Primer really is your friend.  
2) Always have more spray paint than you think you need.


    Now in this case, I really had no excuse to for the fact that I ran out of spray paint.  I mean, there were several cans of white spray paint on sale for $1.97 at Joann's and I walked out with one?!  Perhaps the fact that they lock it up there makes me feel like I should buy only responsible amounts at a time?  Thank goodness I already owned white primer that matched so I was able to squeak by with the two together.  In all honesty, I should have primed first like a smart DIYer would have done, but in the heat of the moment I just got excited and started spraying without really thinking.  Plus, I was saving my primer for a big summer project I have lined up!  But it would have saved me some major time in this case.

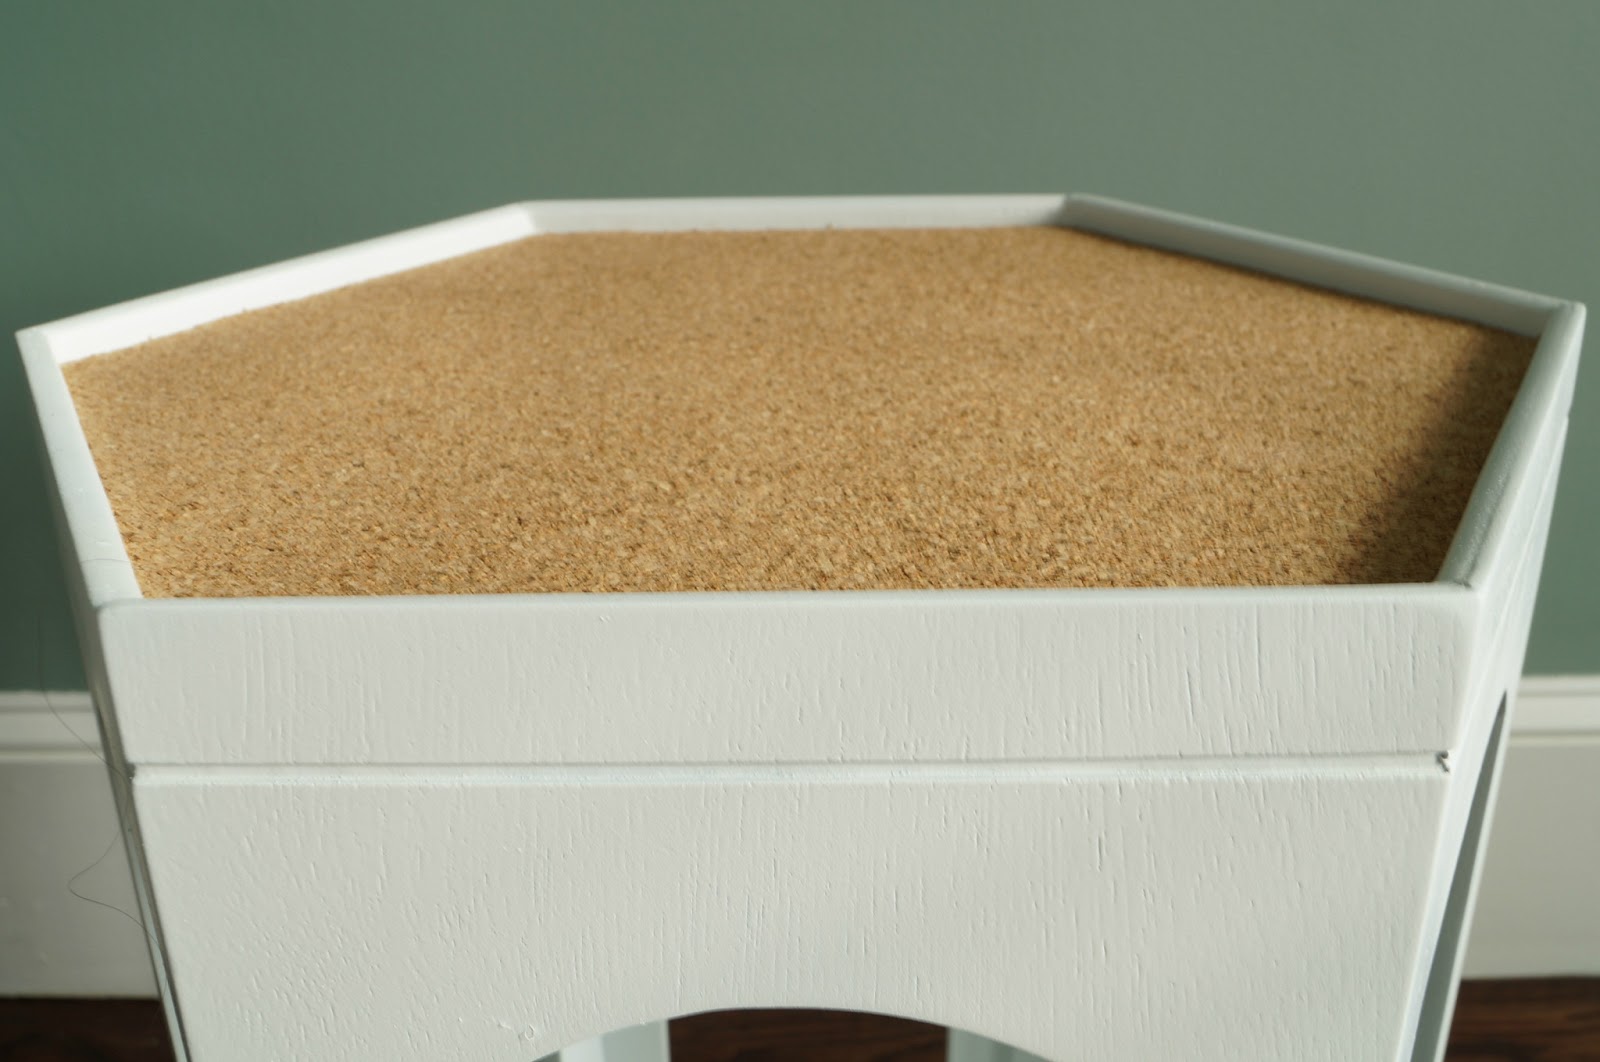
    Anyway, back to the how-to.  I am blessed with an extremely handy husband who's way more into details than I am when it comes to things like this, so it was his job to cut the cork into the perfect hexagon to fit atop the table.  He first cut some brown craft paper to size to serve as a template for the cork.


    He got out the good old X-acto knife and got to work.  Then I used some Krazy Glue and spray adhesive to attach the cork to the table.  See my super-professional system of weighing down the edges to ensure good adhesion?



    Here's a close-up of the finished cork top.


     And here it is in action!


     It was so simple that I kind of want to try it on something else now.  Thanks for stopping by! 


Related Posts Plugin for WordPress, Blogger...